Preparing your RV or camper for winter is essential to protect it from the harsh cold and prevent costly damage to your water system and plumbing. Using the air compressor method to winterize your RV is a smart and effective way to ensure all water is removed from the lines, preventing freezing and potential problems in the coming months.
In this guide, we’ll share everything you need to know to properly winterize your RV with compressed air so you can store it safely until warmer seasons return. Follow these tips and step-by-step instructions to keep your RV in top condition and ready for your next adventure!
Why do you need to winterize your RV?
Winterizing an RV is a crucial process for ensuring the longevity and functionality of your recreational vehicle during the cold winter months. The primary reason for winterizing a camper is to protect the water system from freezing temperatures.
When water inside the RV's pipes, tanks, and fixtures freezes, it can expand — causing pipes to burst, fixtures to crack, and severe damage to the entire water system. Additionally, if water freezes in the holding tanks, it can create a mess and potentially damage the tanks themselves.
This damage can lead to costly repairs in the spring and a delay in hitting the road for your next adventure.
Benefits of winterizing with an air compressor
One of the most effective ways to winterize an RV is by using an air compressor. Here are a few unique advantages to this method:
Thorough water removal
An air compressor can blow out every drop of water from your camper’s water lines, which leaves no room for freezing and expansion. This reduces the risk of cracked pipes from any residual water left in the lines that can freeze.
Less mess and cleanup
The air compressor-based winterization method tends to result in a cleaner process with fewer spills and messes, mostly due to the lack of need for multiple gallons of antifreeze. This can make the overall winterization of your RV more efficient and less time-consuming.
Avoiding antifreeze residue
When you rely solely on RV antifreeze, you'll need to flush the system thoroughly in the spring to remove any remaining antifreeze, which can affect the taste and smell of your water. Using an air compressor minimizes the amount of chemicals used, reducing the need for extensive flushing in the future.
Environmentally-friendly
Using compressed air to reduce the amount of antifreeze you use and introduce into your plumbing system is far more environmentally friendly than typical methods. Proper disposal also minimizes the potential for any antifreeze to be consumed by animals or leach into groundwater.
What you’ll need to winterize your RV using compressed air
To winterize your RV with an air compressor, you only need a few tools to effectively complete this process. Here's a list of the essential items:
- Tankless, portable air compressor
- Blow-out plug
- Adjustable water pressure regulator
- Male quick-connect plug
- Female quick-connect
- RV antifreeze (a small amount for protecting p-traps)
How to winterize an RV with an air compressor
The following process will effectively winterize your RV with compressed air, protecting your water system from the freezing cold weather. Here’s a step-by-step guide on how to prepare your RV for winter:
- Prepare your RV: Start by turning off the power for your camper as well as its water heater and water pump. Also, make sure all faucets, showerheads, and low-point drains are closed.
- Drain flush black and gray tanks: This is usually done after every trip, but it's a very important step in the winterization process. Leave your gray valve open and the sewer hose connected when you’re done.
- Note for TAXA owners: TAXA habitats don’t have black water tanks.
- Drain the freshwater tank: Open the drain valve on your freshwater tank and let it fully drain.
- Bypass the water heater: If your RV has a water heater bypass kit, use it to isolate the water heater from the rest of the system. This will save you from having to fill it with antifreeze.
- Remove water filters: Take out any water filters or water softeners that are in your system.
- Prepare your air compressor: Make sure the air compressor is set to a safe pressure, typically between 30-50 PSI. Connect the blowout plug or adapter to the compressor hose.
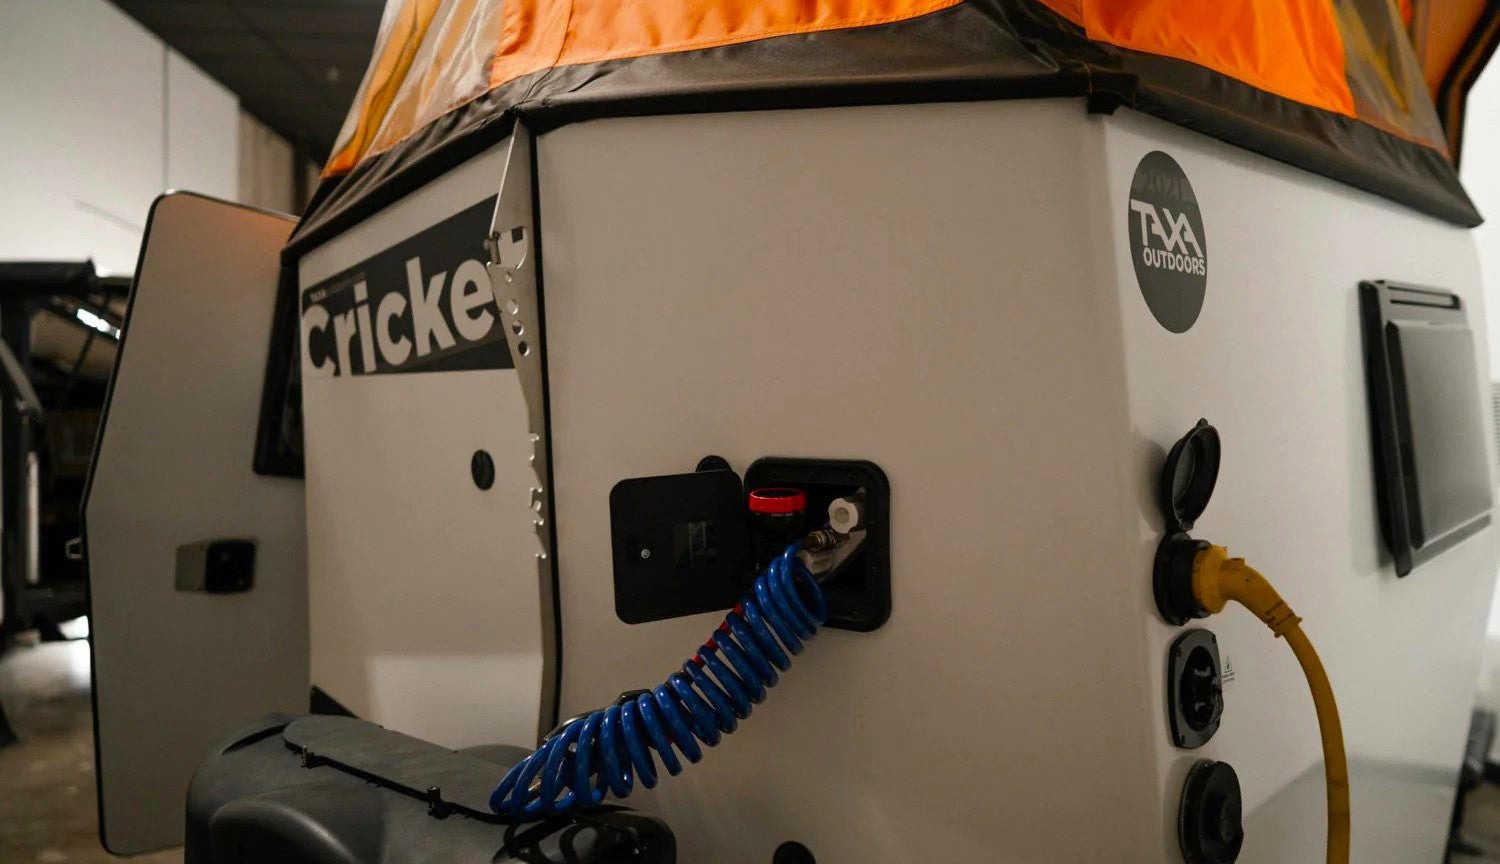
- Connect the compressor to the water inlet: Use a wrench to remove the cap from your RV's city water inlet. Attach the blowout plug or adapter in its place, ensuring it's tightly secured.
- Open the RV water system: One by one, open each faucet, showerhead, and the low-point drains inside the RV. Start with the highest point and work your way down. This will allow the compressed air to blow out any remaining water from the lines. Remember to open both the hot and cold water sides separately to ensure all water is removed. Don't forget to flush the toilet a few times to clear the water from the bowl and valve.
- Turn on the air compressor: Once you turn on the air compressor, blow out the lines in 30-second intervals, waiting several seconds between each interval. Continue to do this until no water is coming out of fixtures and lines.
- Monitor the air pressure: Keep an eye on the air compressor's pressure gauge. It should remain steady as it pushes air through the system. If the pressure drops significantly, it may indicate that there's still water in the lines.
- Don't forget the p-traps: Pour a small amount of RV antifreeze down each sink and shower drain to protect the p-traps. Also, pour a bit of antifreeze down the toilet to prevent any water in the bowl from freezing.
- Final checks: Double-check that all faucets, drains, and the toilet have antifreeze in them. Reinstall any water filters or softeners if you removed them.
- Close everything up: Disconnect the air compressor, replace the cap on the city water inlet, and secure it with a wrench. Make sure all drains and faucets are closed tightly.
- Outside fixtures: If your RV has an outside shower, windows, or other fixtures, be sure to follow the same process for them.
- Label and protect: Label any valves or fixtures that are unique to your RV to make it easier to de-winterize in the spring. Store hoses and other water-related accessories indoors to protect them from freezing.
Video: Step-by-step instructions to winterize your RV
If you’d like a visual guide to the entire winterization method, watch our video below for easy step-by-step instructions:
Winterizing with compressed air FAQs
What air pressure should the air compressor be for RV winterizing?
When using an air compressor to winterize your RV or camper, it’s important to regulate the air pressure properly to avoid damaging your plumbing system. The recommended air pressure typically ranges from 30 to 50 PSI (pounds per square inch). Start low with 30 PSI, as too much high pressure can cause damage to pipes and water lines.
How much antifreeze does it take to winterize a camper with the compressed air method?
The exact amount of antifreeze you need will be based on your camper’s specific layout and features. Typically though, you’ll need around one quart of RV antifreeze to winterize a camper with the compressed air method. However, if you are not using compressed air, you will need around three to four gallons. Remember that it's essential to use RV-specific antifreeze, as it is designed to be safe for use in potable water systems and will not be harmful if ingested in small quantities.
What temperature should it be to winterize my RV with an air compressor?
The goal of winterizing is to ensure that all the water in your RV’s water system is removed (or replaced with antifreeze) to prevent it from freezing and causing damage. The temperature that we recommend doing this is typically when temperatures are expected to consistently drop below freezing, or 32 degrees Fahrenheit. The exact timing will depend on your location and local weather conditions, but it’s best to winterize your RV before the onset of freezing temperatures.
Year-round adventuring with a TAXA habitat
Using an air compressor for winterizing your RV or camper is an effective and efficient method that not only protects your water system from freezing, but also offers cost savings, environmental benefits, and a cleaner, less labor-intensive process. So, whether you’re winterizing your RV for multiple months at a time or just getting it prepared for a short stint in storage, we hope this guide proved helpful.
At TAXA Outdoors, we build habitats that encourage outdoor exploration and provide you with everything you need, and nothing you don’t. With designs inspired by NASA’s space engineering principles, our campers are both easier to store than the average travel trailer and provide some of the best cold-weather camper capabilities. Curious to learn more? Talk with a TAXA habitat specialist, find a dealer near you, or experience a TAXA in person today!