One of my favorite things about our Mantis is how easy it is to perform my own maintenance. I will admit, I describe myself as “fairly handy” around the house. However, I think most of what I have done in and around our Mantis would be easily accessible to most people with a little help from YouTube. Servicing wheel bearings, resealing seams and winterizing the water system are just a few examples of procedures that our Mantis makes easy.
I recently met my match in repairs when we suffered a severe hailstorm – with softball size hail – which left our beloved Mantis with two broken windows and multiple dents. I won’t bore you with the insurance side of this story, as it is still ongoing, but I do want to share what I learned when replacing the windows.
I ordered the replacement windows through TAXA – my only advice for this process is to read the window description several times to ensure you pick the right size.
Required tools:
- Phillips head screwdriver
- Utility knife
- Powered screwdriver/drill with flathead or ¼ inch socket bit

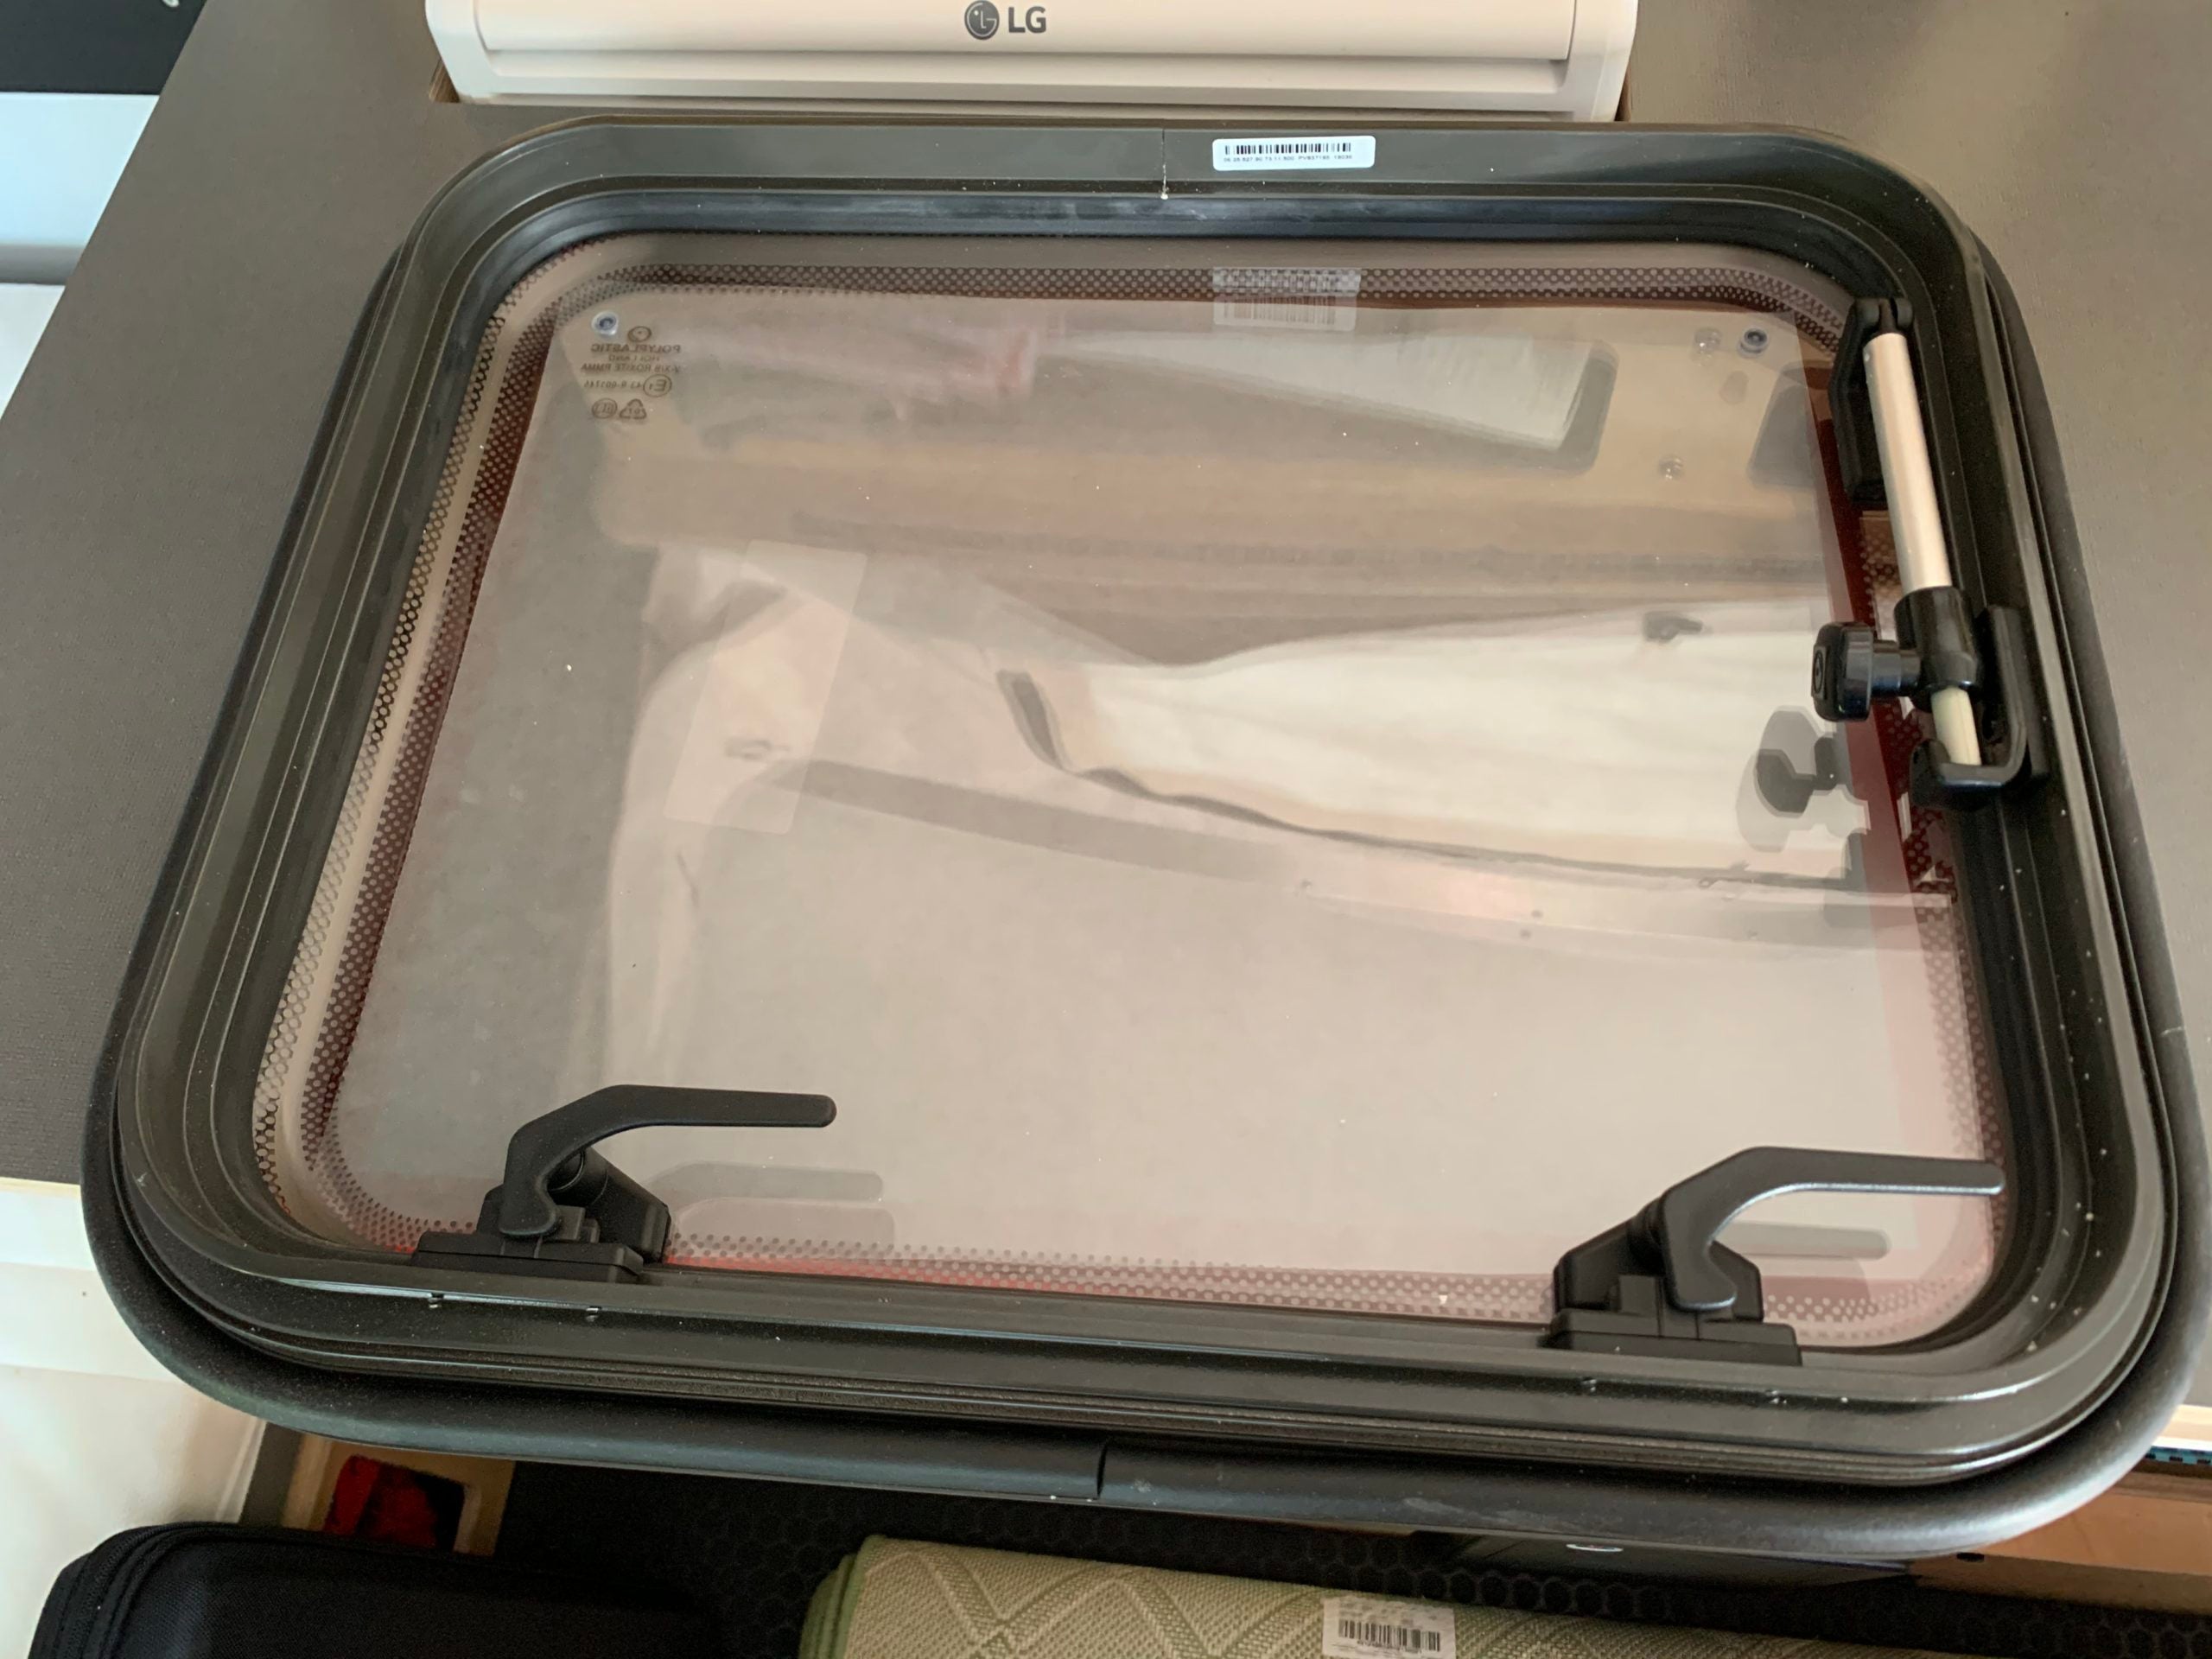
The first step is to remove the window screen. There are 4 pieces of corner trim which snap off to expose the 4 screws that secure the screen assembly to the window. Remove these screws and the screen pops off the window, exposing the brackets which hold the window to your habitat.

Depending on the size of the window, there will be 8 or 10 of these brackets screwed straight into the window trim. Use a drill or screwdriver to remove these brackets and place them to the side – you will use them to secure the new window in place. After removing the brackets, apply pressure to the window until it becomes dislodged from its position. I would advise having a helper close by to ensure the old window does not just fall out to the ground.


The next step will require a helping hand, as you will need someone to hold the new window in place while the mounting brackets are installed around the outside of the opening, using their previous location as a guide to ensure the window is secure. After re-installing the brackets, conduct a leak check to ensure the gasket around the window is providing a good seal. I used a hose while my wife watched from inside.
Next, you will re-install the shade. I ran into a small difficulty with this step, due to a lack of finesse on my part. While the shade comes out easily, when you replace it on the window, pay attention to the plastic trim that runs along the inside of the shade assembly. This trim has to fit around the window for the assembly to fit correctly, my advice is to take it slow, going corner by corner to ensure it fits around the window properly. Once this is complete, fix the screws at each corner and replace corner trim. And with that you have a newly installed window and can get your habitat back to the outdoors where it belongs.